My Geranium & Pelargonium Propagation Method
|
by Jane Fletcher
INTRODUCTION: This is a distillation of lots of experimentation (and lots of failures) and reading around the subject of cloning and propagation of geraniums and pelargoniums over the last two years. This method has worked for me, over and over again, with good results. |
|
Supplies: Small clean pots Generally the smaller the better. Usually 7cm x 5 cm pre-fill pots and put them in a quarter filled with potting mix kitty litter tray.
Propagation mixture I use 50% finest Perlite and 50% Osmocote Seed Raising Mix. (Wear mask when using Perlite) Wet mixture with water BEFORE planting the cuttings. Moist but not dripping. Kitty Litter Tray $3-$4 from Kmart, Red Dot, Reject Shop etc. Put 3 cm of propagation mixture in the bottom of the kitty litter tray. The benefit this deep tray with propagation mix in the bottom is that if you over water the cuttings the water drains away from the small pot and they don’t sit in water. The small cuttings seem to survive much better when they are all together in the deep tray. There must never be wet propagation mixture under the cuttings, damp only. Stanley Knife with a fresh SHARP blade. NEVER BLUNT (Crushes the stem and then plant dies) To clean blade wipe with methylated spirits between cuttings. |
|


|
Take Cuttings: Ideally, you want to end up with cuttings that are 10cm-15cm (4-6”) long with 2-4 healthy leaves up top. Choose a new stem that is green and fresh and the nodes are relatively close together. Cut just below the leaf node on a slight angle with a clean blade. Try to have two nodes above ground and two nodes below ground.
|
|
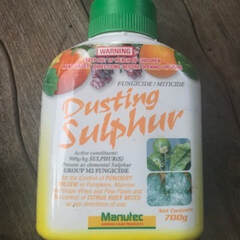
knock off excess powder, dust any wounds on stem from where leaves were removed and flower stems removed with Dusting Sulphur.
Planting: Using a dibber make a hole in the propagation mixture in the tube and insert the prepared plant stem gently. Gently press down the mixture to secure the cutting. Bury deep enough so that at least two bare leaf nodes are in the propagation mixture. First location after being planting: I place kitty litter tray full of cuttings on a table in an undercover al fresco area (no rain, no sun, no wind), in a BRIGHTLY lit area for one week. Then on a table closer to morning sun (no afternoon sun/heat, no wind) for another two weeks (approx.) then on a table which receives morning sun until roots appear at base of pot. Watering your cuttings: As the propagation mixture is ALREADY MOIST there is no need to water after planting. Generally, I don’t water for about 5 days after planting unless it is very hot. Then, when the little pot looks dry on the top and feels light, I water with about 20ml of water per little pot. If a pot still looks damp or feels heavy, I don’t water it. I have lost more cuttings to over watering than to under watering. As temperatures increase watch the cuttings closely ie a few times a week and water sparingly as needed. When temperatures are over 30°C spray mist the cuttings with water every couple of hours during the hottest part of the day as well. Fertilizing your cuttings: When I see tiny new growth on the top of the cuttings, and the plants are dry enough to warrant a watering, I use a weak solution of Thrive. Thereafter, I use this weak Thrive solution to water the cuttings. Potting on: When your plant is growing plenty of new leaves and also roots are starting to grow out the bottom of the little pots and into the soil at the base of the tray then it is time to pot on to the next size up. Only ever pot up in small increments otherwise it is easy for your little plant to be over watered and not survive. |
